To get to the putin, drive down SCE access road 100 yards before park entrance station on Hwy 198. Cross Bridge and go to parking lot of Power Plant. Unload boats etc. and have someone drive your car to the takout. Do not leave your car here as they may lock the gate behind you. If the gate is closed at Hwy 198 unload here and carry 1/4 mile to putin. There is no parking anywhere near this access road. The few parking spots at the park entrance station are for "park employees and emergency vehicles only". An alternate Put-in is 1/4 mile further upstream at the Indian Head turnout in Sequoia National Park. A short trail drops 100 feet down to the river. This Put-in requires running or portaging the SCE diversion dam 200 yards below the Put-in as well as $20 park entrance fee or $30 for an annual park pass.
Flood of Jan 97 Update: The 5 ton bridge was washed away in the flood and replaced with a 20 ton version. Compliments to Southern California Edison Company for removing all the old wreckage from the river. The boaters really appreciate it.
The river drops 115 feet in .6 miles to the confluence of the East Fork. Drops are evenly spaced and for the most part the river bed is narrow and cut into solid bedrock. This makes for alot of turbulence even at low to moderate flows. Portages are easy and the entire run takes a mear 15 minutes. This section is very runnable between Zero ft and 1.1 ft on the Dinely Bridge Gauge and has been run at 2.5 ft but was reported to be extremely pushy. This section is class 5 at higher flows and a solid class 4 at any level. Most drops are more difficult than anything below Pumpkin Hollow Bridge but not as big as some of the stuff on the North Fork.
Diversion dam feeding flume to SCE Plant No. 2. Runable at lower flows. Put in above the dam if you like. You be the judge. 85 cfs leaves the river.
All photos taken at 0.5 ft on the old Dinely Gauge (Approx 300 cfs in this section)
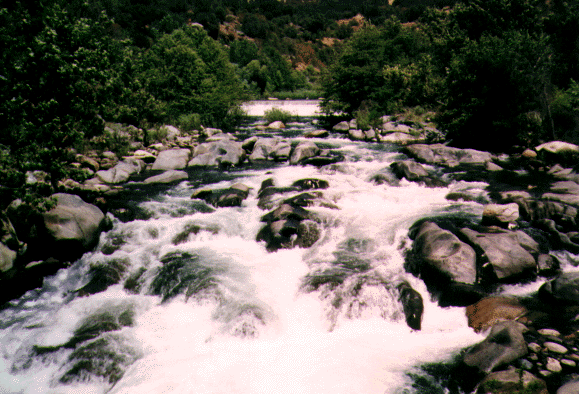 No1 from the bridge below
No. 1 (Class 4/4+)
75 yards of whitewater. The most straightforward route is down the left side. A short pool under the bridge gives a brief rest before the next rapid.
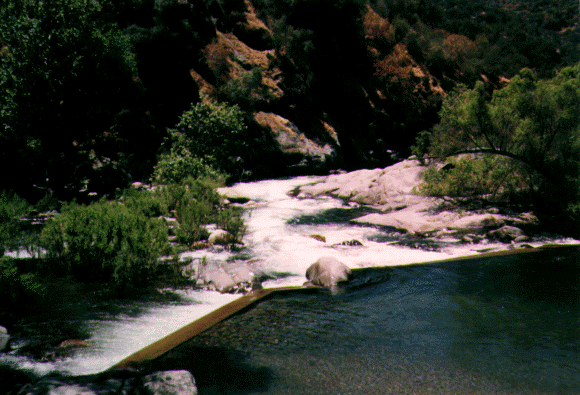
Bridge to Southern Calif Edison Plant No. 3 Crosses the river. The gauge is on the right on the downstream side of the bridge.
 No. 2 from the bridge above
No. 2 (Class 4/4+)
Run the weir dam left center and on through 75 yards of action. The action picks up near the bottom and ends with a right turn up against the left wall and into a pool.
No. 3 (Class 3+)
Short sliding drop left to right.
No. 4 (Class 4/4+)
Another short left right left sliding drop into a pool. There's some hydraulics and a hole at the bottom left up against the nose of "The Dog Rock". Try to get right and stay right as you make the first right hand turn into the drop.
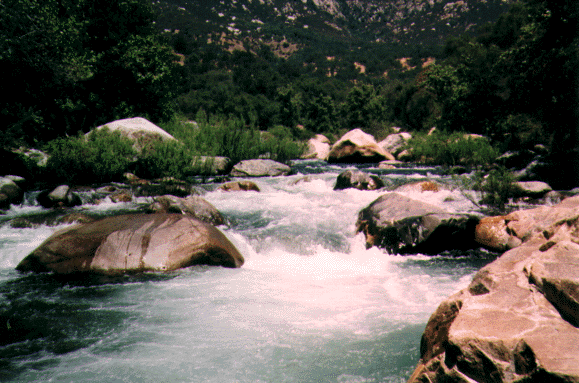
 No. 3, No. 4 and No. 5
No. 5 (Class 4)
5 ft. pourover drop with a hole at the bottom. Avoid the hole by running far right where the current is flushing. Eddy out quickly as the pool is fast moving and it's only 50 ft to the next crucial drop.
 No. 6 looking downstream
No. 6 (Class 4/5)
Possible PORTAGE on right. Scout right and/or left depending on the side you're thinking of running. The left is runable with more water, the right with less water. Do not pin on any of the rocks in either route. The seal launch below the portage is a fun 10 foot slide down the smooth granite.No. 7 (Class 2+)
Little riffle.
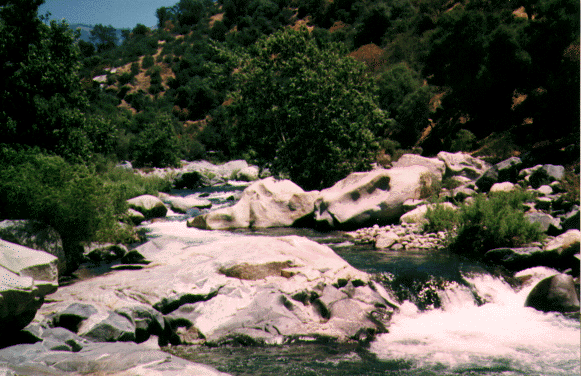
 No. 8
No. 8
No. 8 (Class 4-)
Larger drop in 2 stages
No. 9 (Class 3)
Sliding drop over smooth granite slabs.
No. 10 (Class 3+)
Entrance rapid to the PORTAGE. Marked by dark brown house on the right 30 ft. directly above the river. Run left and stay left. Beach your boat in the willows on the left before going around the next bend to the right.
 No. 11 (Very Ugly!)
No. 11 (Class 5/6)
PORTAGE on left. Launch from the rock a bit below the hazardous area or portage further down to the next pool. This drop has a couple of dangerous undercut rocks on the right side the channel and all the water is going right into them.
Flood of Jan 97 Update: Sorry, the undercut rock is still there and just as ugly as ever. Reports have had Team Kamakazi running this rapid at higher flows but locals who have seen what's under the big boulder at low water know better. It's not worth it.
Flood of Nov 2002 Update: The undercut rock is still there and almost as ugly as ever. However, the car sized rock in the center bottom of the drop was washed away making this drop runnable at lower flows. The drop is still dangerous and some bad situations have occurred in the undercut rock. Thankfully no one has been killed yet in the very dangerous uncercut. Kayakers have been stopped by the hole bottom right and surfed into the undercut. The bottom hole is more difficult and serious than it looks.
 No. 12
No. 12 (Class 4)
Large pourover type drop with lots of hydraulics at the outflow. It's only a few yards to the next drop so plan your line carefully and execute exactly. Exit the drop on the far left to be set up for the next one.
 No. 13 from above
 No. 13 from below
No. 13 (Class 4/4+)
A twisting S-turn route wieves among boulders on the left in full view of the customers at Gateway Restaurant sitting on the deck outside. The right side route on this rapid is less difficult and recommended when there is more water. The hero route is up against the wall on river left. A pretty good keeper hole lurks in the middle of the river at the bottom.
Flood of Jan 97 Update: The route was a center entrance and left exit this year. The center hole at the exit is big and recirculates. Scouting is easier now that a pile of boulders has been deposited for use as a stairway to the top of the previously inaccessable mega boulders on the left of the main drop.
No. 14 Class 3)
Wieve between a couple more boulders right under the noses of the restaurant patrons. Do a roll and they'll throw you a beer.
 No. 15
No. 15 (Class 3+)
Short and very steep boat bashing boulder pile decent to confluence of the East Fork. The left side deals the lesser bashing.
Flood of Jan 97 Update: The preferred exit to the confluence is now down the right channel under Pumpkin Hollow Bridge.
Pumpkin Hollow Bridge. Do not take out here.
Look upstream at Hospital Rock Section (Class 5+) or the Ash Mountain Section (Class 5)
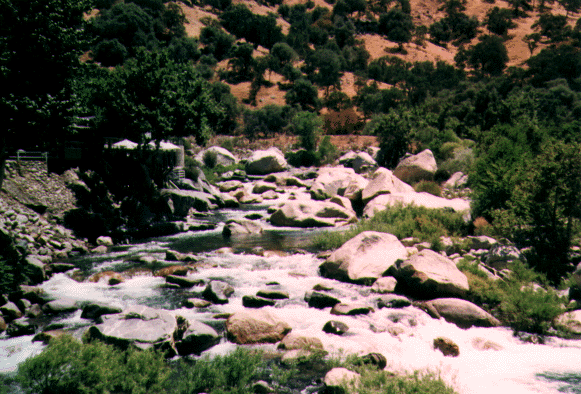
Continue downstream Gateway to Dinely Bridge (Class 4)
Copyright © 1996, 1997, 1998, 2008 by Bill Pooley. All rights reserved.
This page is http://www.c2.com/kaweah/log_pkbndry2gateway.html
Originally published: 04.28.98 Updated: 07.03.08